Custom Object Management
The CatDV Server management interface provides a simple interface for creating and managing custom objects. This interface makes it straightforward for a non-technical user to manage static data represented by custom objects.
Managing Custom Object Class
Custom object classes are managed via the “Custom Objects” management page accessible in the ‘Customisation’ section of the management UI.
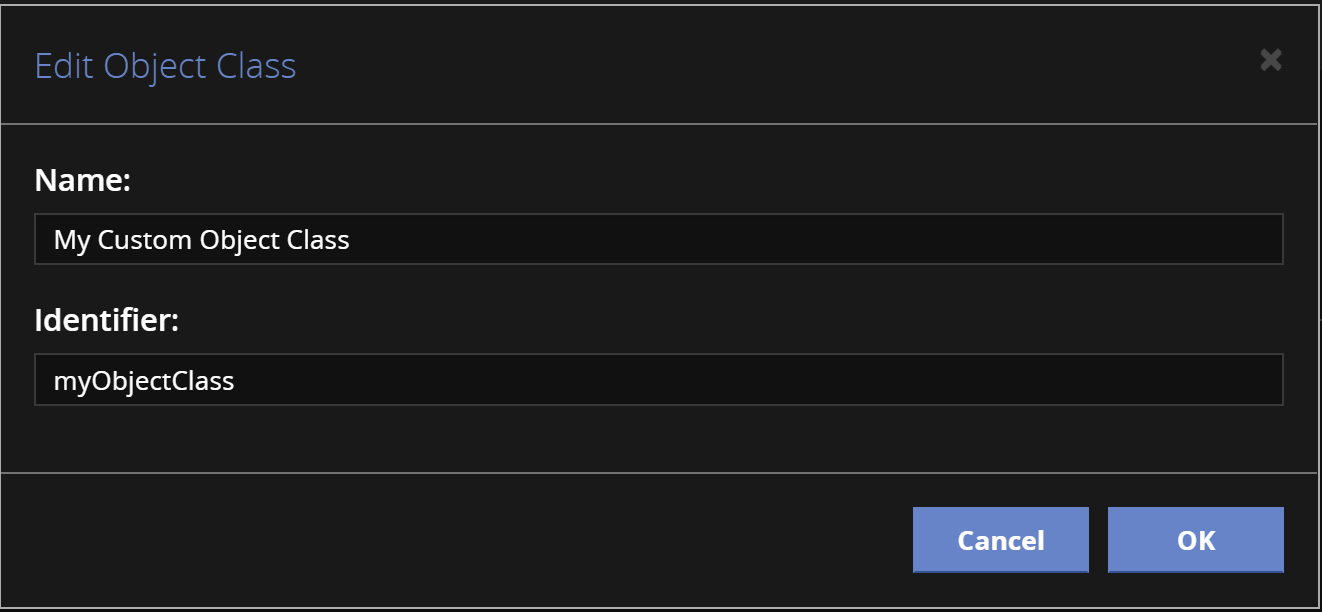
To create a new Custom Object Class click on the ‘Add’ button. You will be prompted for a display name and identifier, which should be a single word (no spaces), but can be a compound word using camel case (capitalizing the first letter of each component word):
Having created the new object class you now need to define the custom fields that will be used to store whatever data your object is designed to represent. Click on the “Edit Fields” button to edit the fields:
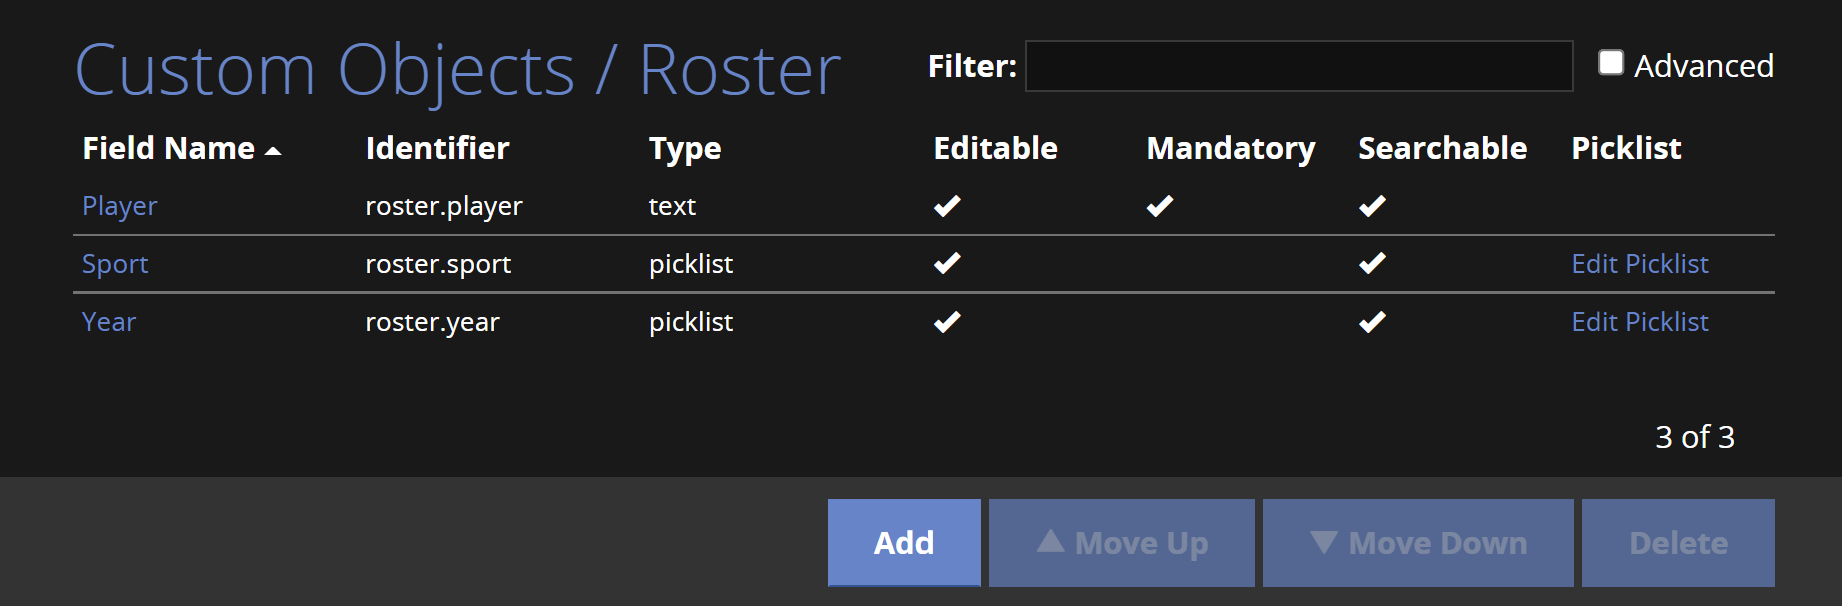
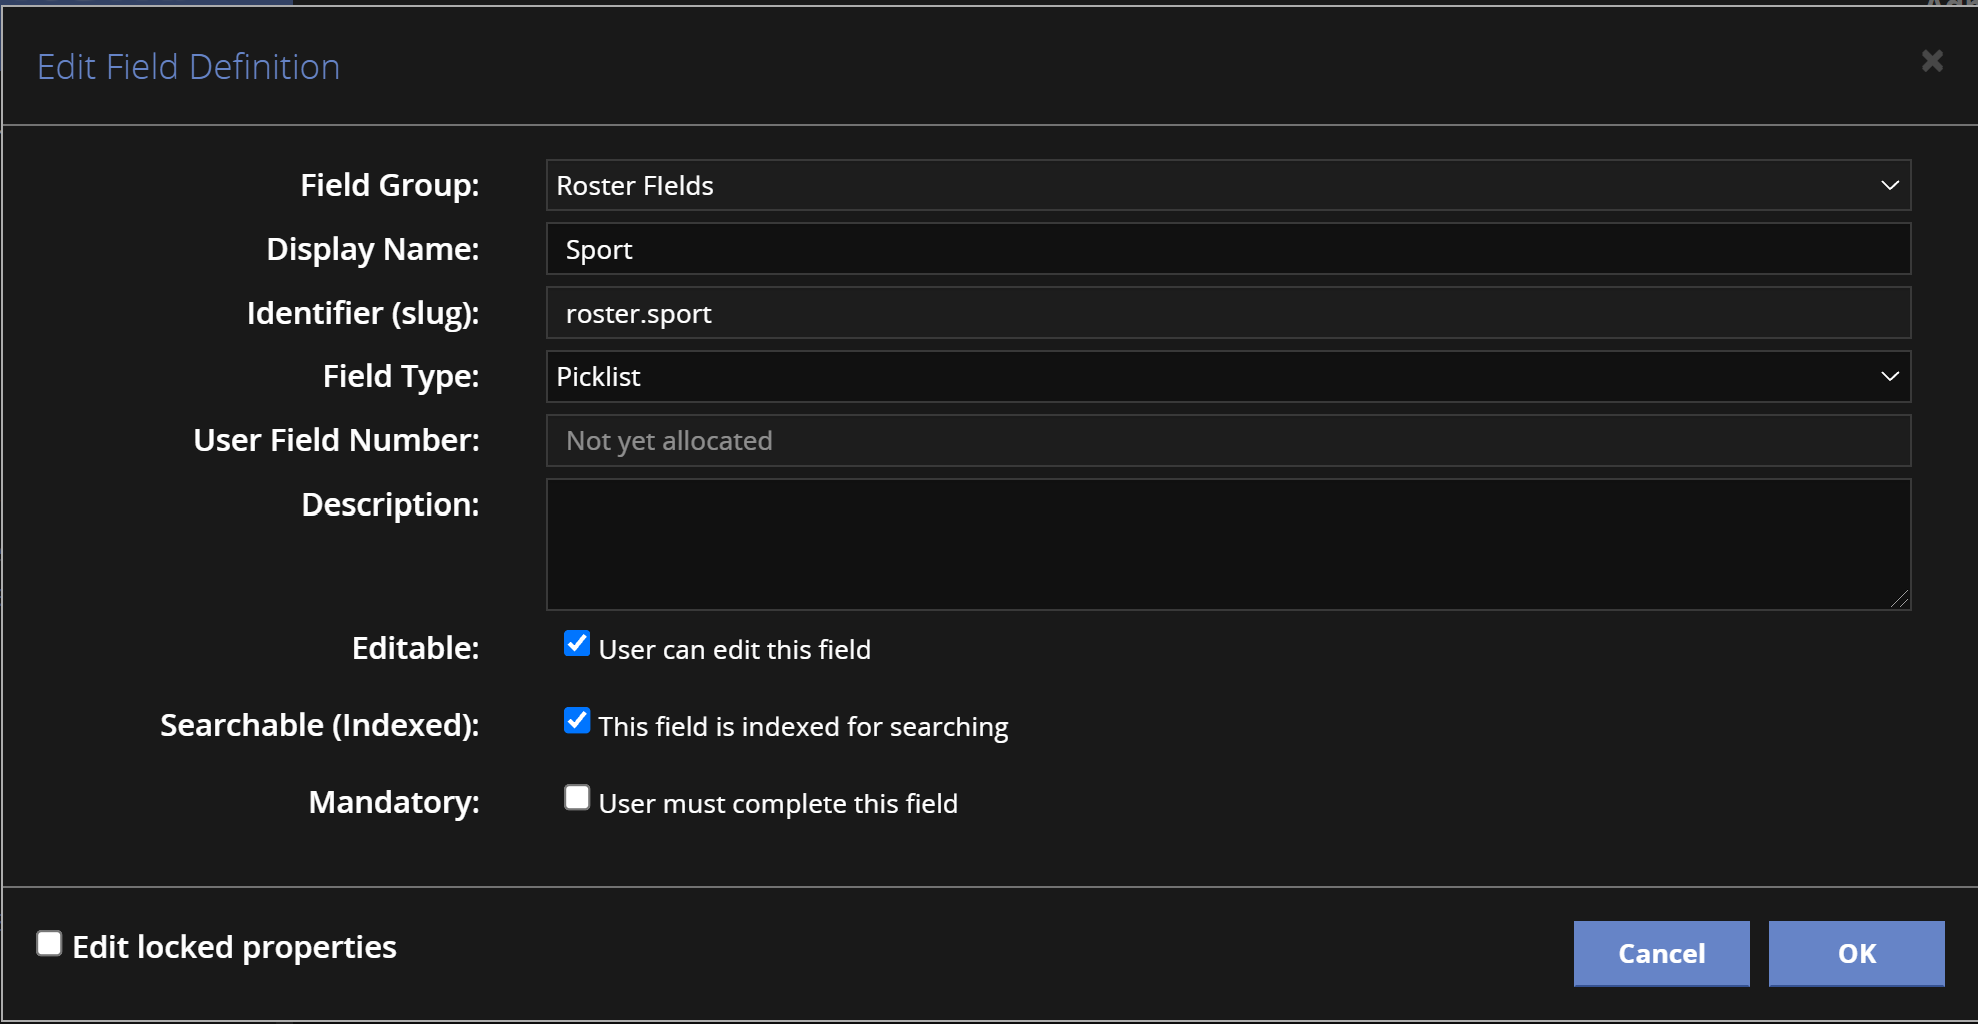
To add a new field click Add, which will bring up the normal user-defined field definition dialog where can enter the name, identifier and type of the new field.
Once created you can edit the field definition at any time by clicking the name of the field in the list.
If the field type makes use of a picklist then the ‘Edit Picklist’ link will be shown in the Picklist column. Click on this to edit the picklist values and to specify if the picklist is extensible etc.
Editing Static Data in Custom Objects
Having defined your custom object classes you can now use the ‘Edit Data’ link to enter any static data you want to store:
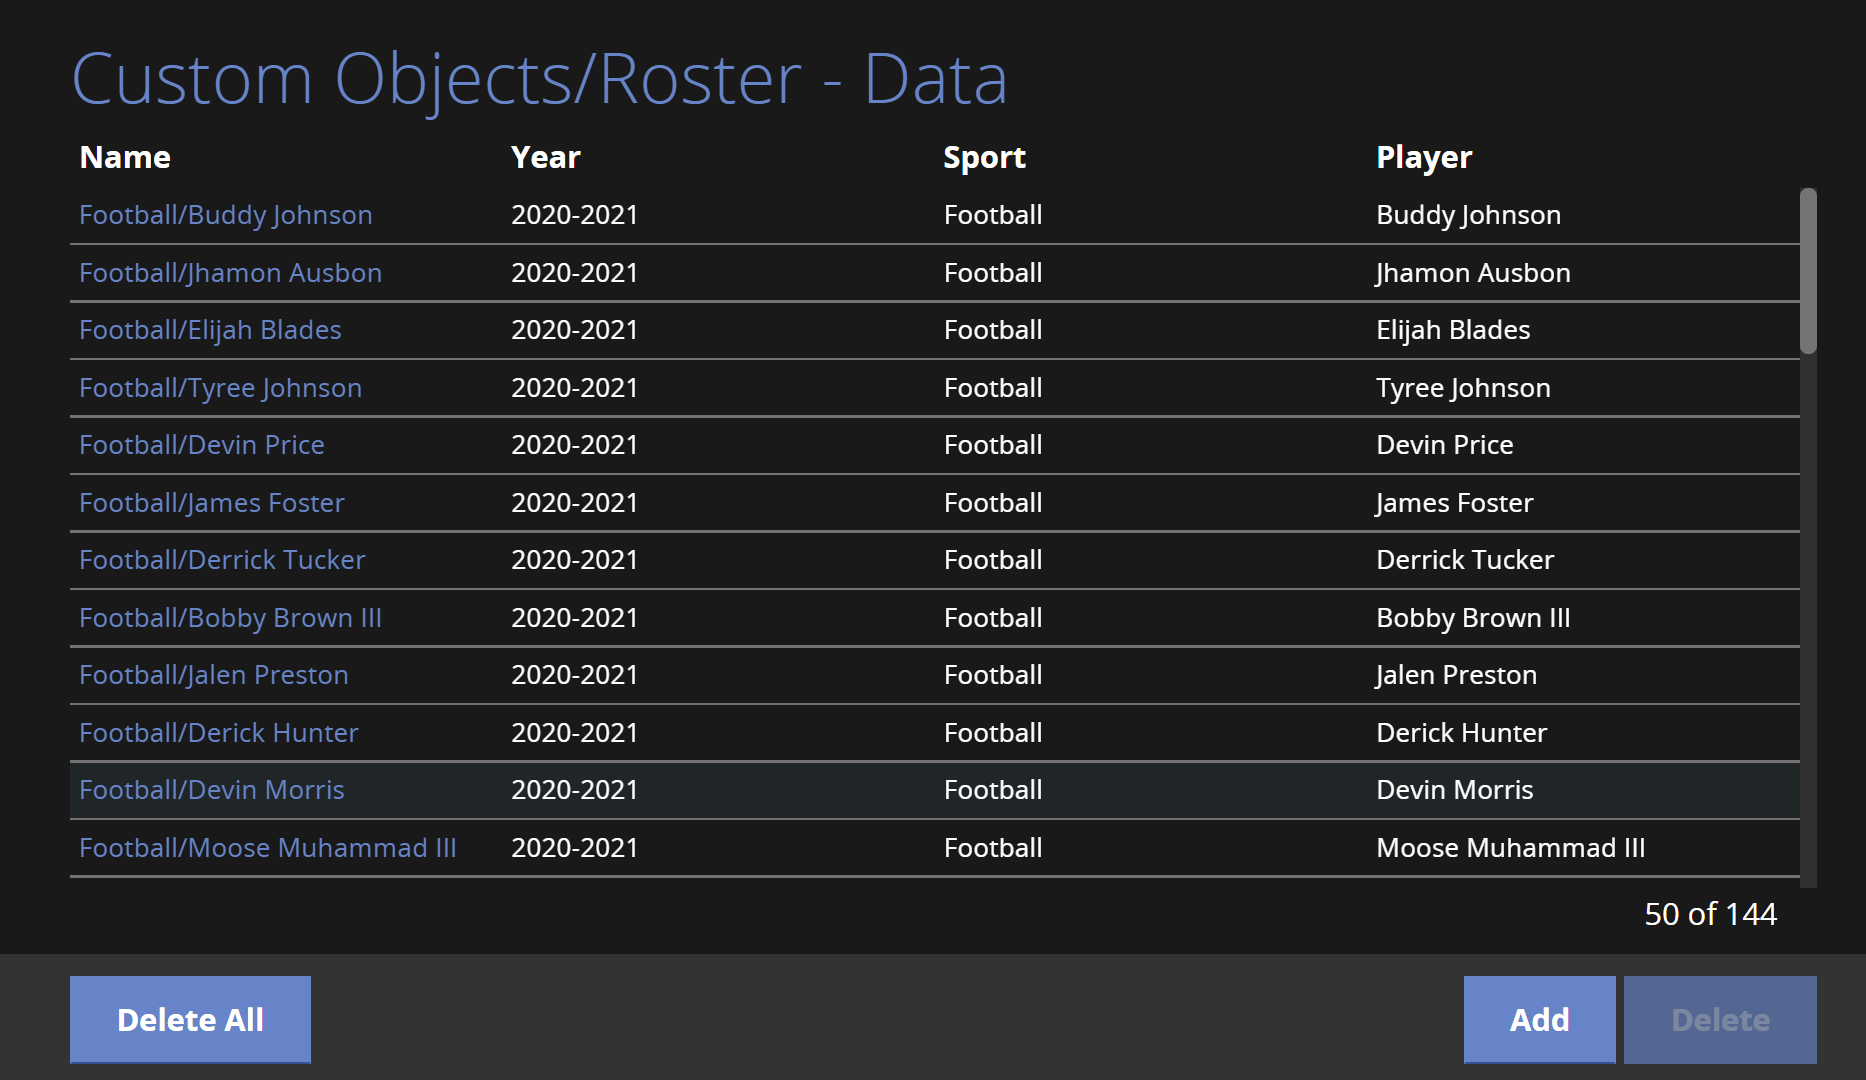
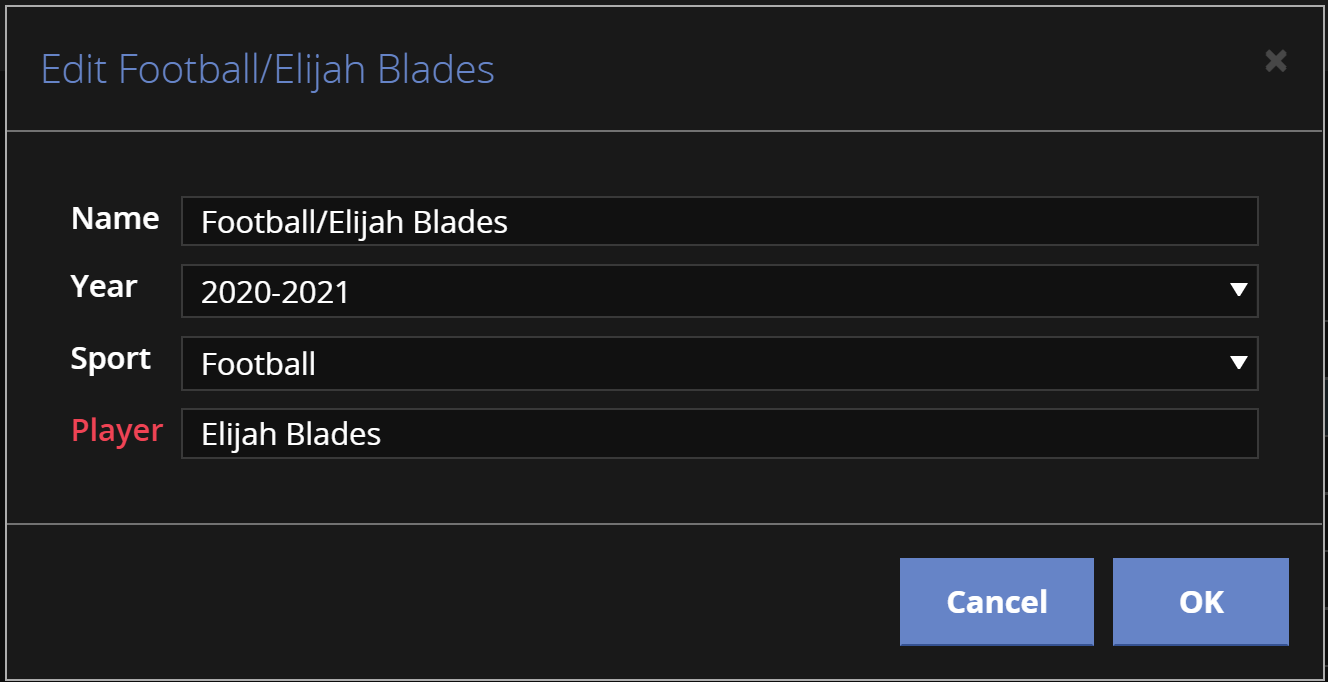
Click the ‘Add’ button, or click on the link in Name column to add or edit a row of data:
You can also delete a row by selecting it (click anywhere on the row other than the name link) and clicking Delete. You can also delete all the data for this object class using the Delete All button.
Example Usage
A common usage for custom objects is to store picklist values, which can be displayed using a calculated picklist.
The following is an example of the JavaScript for a Calculated Picklist that uses the ‘roster’ data above to display a picklist of players, given the sport and a year (season).
In this example there are two other, normal picklists on the current panel where the user has selected the year (clip[sport.year]) and the sport (clip[sport]). The code reads the selected values into the year and sport variables:
var year = clip.get("clip[sport.year]");
var sport = clip.get("clip[sport]");
If either of the sport or year variable are not set then we ‘return’ an empty picklist by calling the calculated pisklists’s setValues() method and passing in an empty array:
if (!year || !sport) {
setValues([]);
}
else {
Otherwise we look to see if we’ve cached the set of players for this combination of sport and year and if so we ‘return’ the cached data:
var values = (year && sport) ? CatDV.get(year + "." + sport) : [];
if (values) {
setValues(values);
}
else {
Otherwise we use the selected values for year and sport to build a query to fetch the correct list of players:
var query = "((roster[roster.sport])eq(" + sport + "))and((roster[roster.year])eq(" + year + "))";
We than call the GET /objects enpoint of the REST API, passing in the query and also specifying that we are only interested in player name by passing in ‘select=roster[roster.player]’.
CatDV.callRESTAPIAsync("GET", "objects?objectClass=roster&query=" + query + "&select=roster[roster.player]", null, function (reply) {
if (reply.status != "OK")
throw reply.errorMessage;
values = reply.data;
CatDV.put(year + "." + sport, values);
setValues(values);
});
}
The presence of the select parameter makes the GET /objects endpoint return a simple array of strings in the reply.data property, which we can pass directly into setValues().
Note that we also cache the data by calling CatDV.put(), which allows us to store arbitrary data against some unique string key. This cached data is checked by calling CatDV.get() earlier in the above code.