CatDV Tutorials – Pegasus
This section contains outline tutorials for CatDV Pegasus. Please use the left hand menu to navigate through the pages.
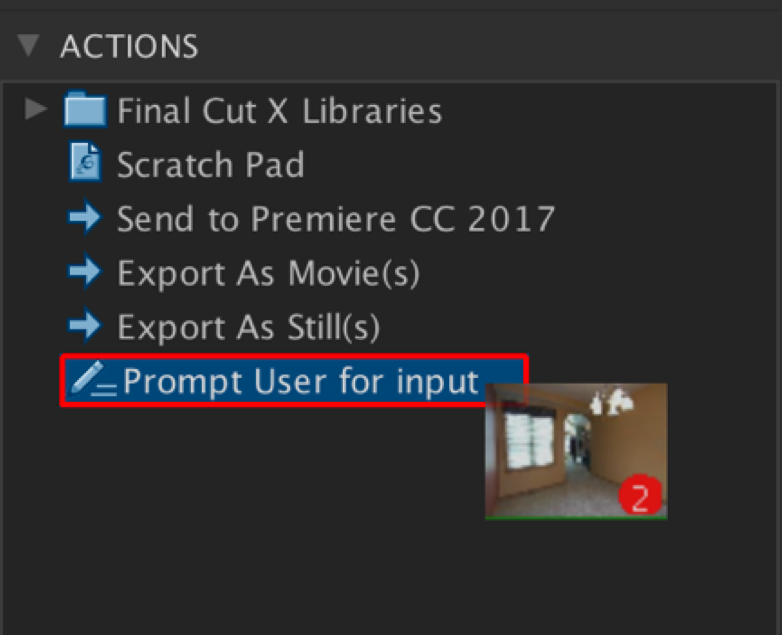
Pegasus Custom Actions
CatDV Pegasus allows you to create automated actions to be used in the desktop client. This allows repetitive tasks or file copies to be automated right from within the desktop. Files can be pushed out from the desktop client to other areas of the network based on matching metadata.
This provides a ‘mini style’ worker available to desktop users.
Creating Custom Actions
Custom Actions can be created using CatDV Pegasus. There are many possibilities from moving files to other storage, updating metadata, transcoding or exporting files to preset formats.
In this example we will setup a simple custom action that requests input from the user. The data entered by the user will be applied to all clips selected
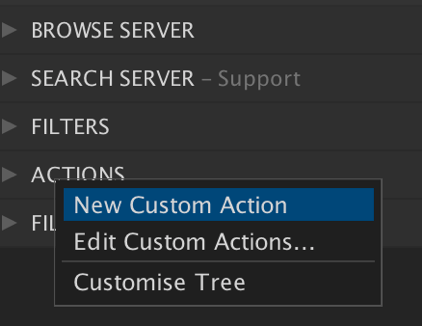
Navigate to the custom Actions panel on the left hand side, right click and select ‘New Custom Action’
Give a name and description to the new action. In this example the name is
‘Prompt User for input’
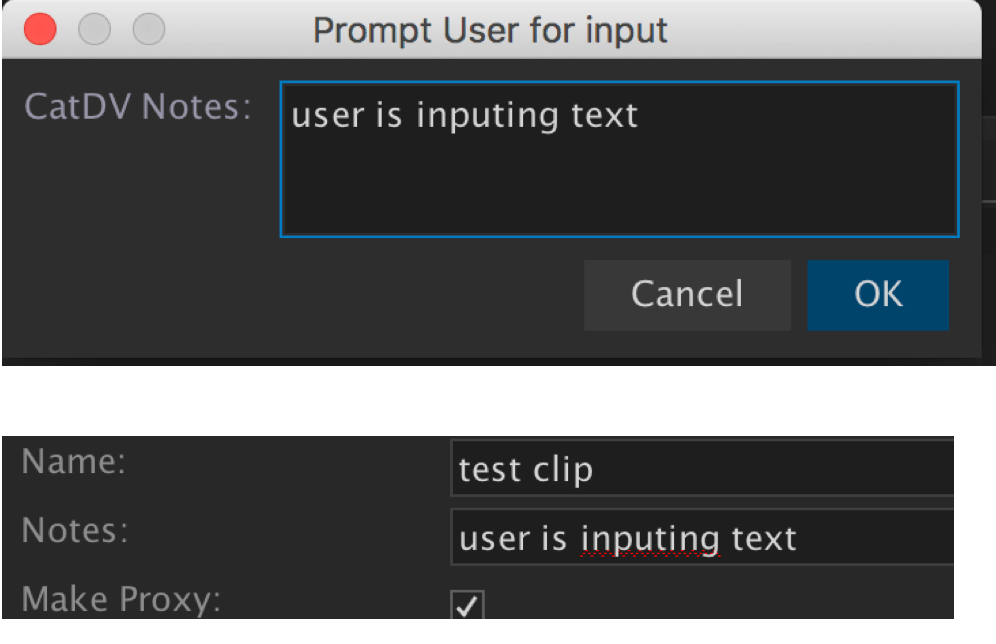
To keep it simple we will just ask the user to add data to one simple text box
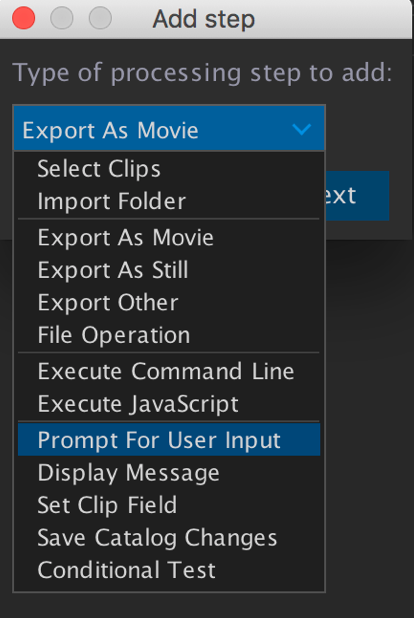
Click the plus (+) icon to create a new action step.
From the drop down select ‘Prompt User for input’ and click Next
This displays the menu to program that step. We will keep the ‘Type’ set to multiline text
Enter a name for the label, this does not need to match any existing label for a user field. This is just a temporary name for the data being collected.
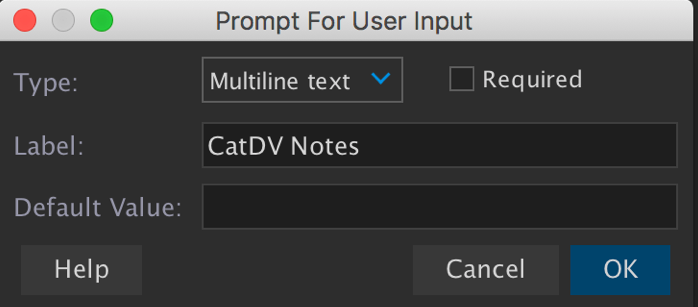
You can choose to add a default value if needed, this could save time during the logging stage if it is unlikely to change that often – in this example we will leave this blank.
If you tick the ‘required box’ then there must be valid data entered by the user to complete the custom action – it would then act as a mandatory field.
Press OK to store the action.
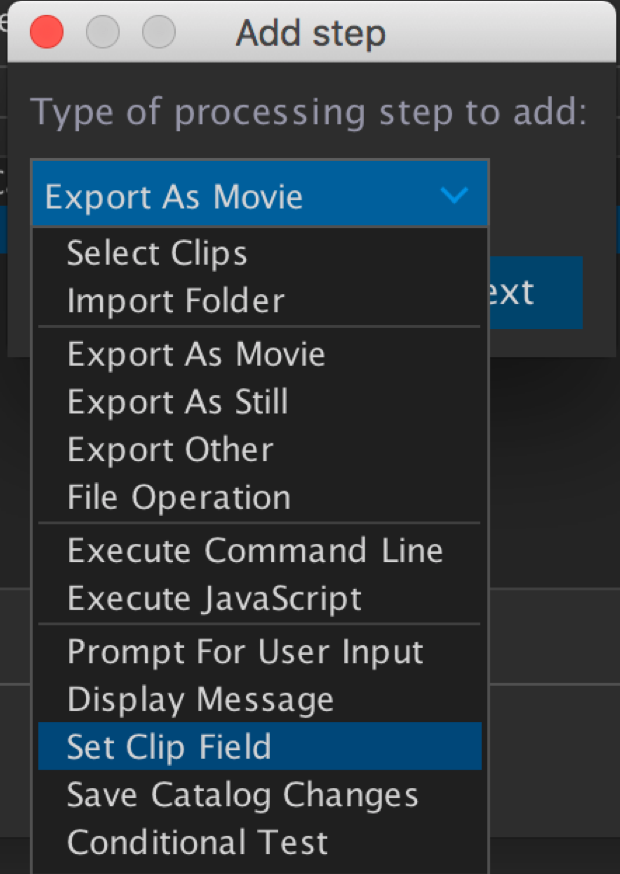
You then need to add another processing step to complete the custom action
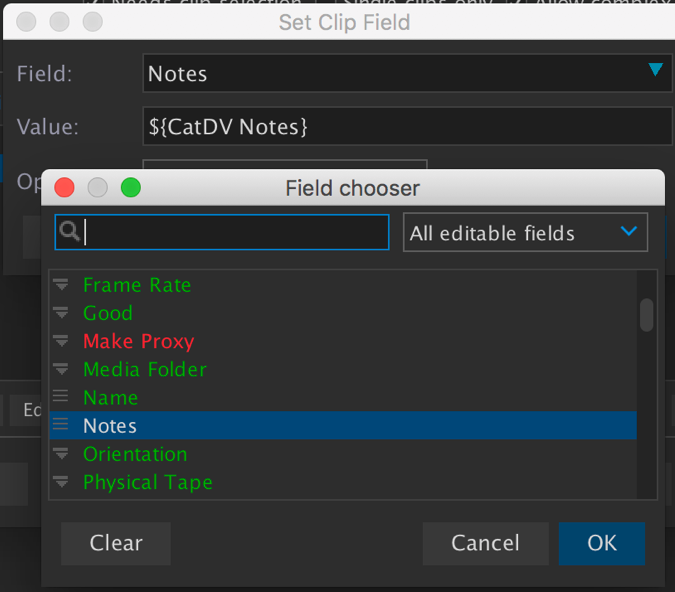
Click the + icon and select ‘Set Clip Field’
This processing step will copy the gathered data from the earlier step into your selected Field within CatDV.
From the dropdown list next to ‘Field’ select the field you want to store the data to.
In this example we are saving the ‘captured’ data to the ‘notes’ field
The Value field reads the data captured from the first processing step. This is stored using a simple regex variable. The variable is ${CatDV Notes}, this was the name given to the first processing step and is surround by curly brackets and stored as {CatDV Notes}.
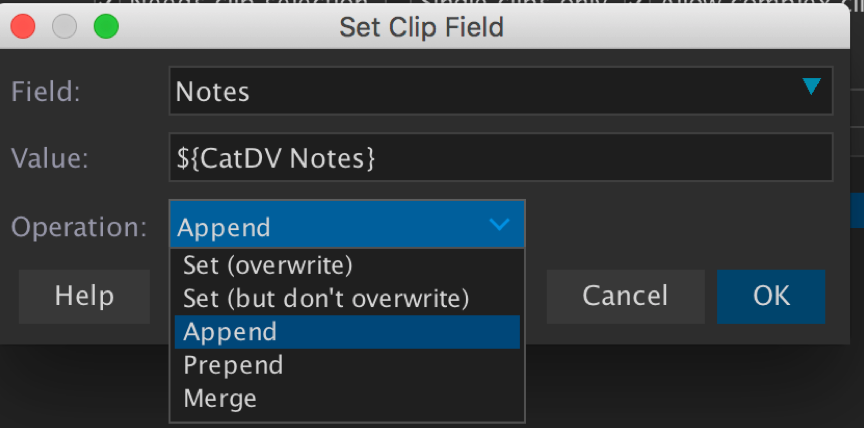
The variable name has to match the name from the first step. There are also options for the stored variable to either append, prepend, merge to existing data stored in the Field ‘Notes’
Press OK to save the processing step.
There are some global options within the Custom Action that you may want to check or uncheck. These setting apply to all clips selected.
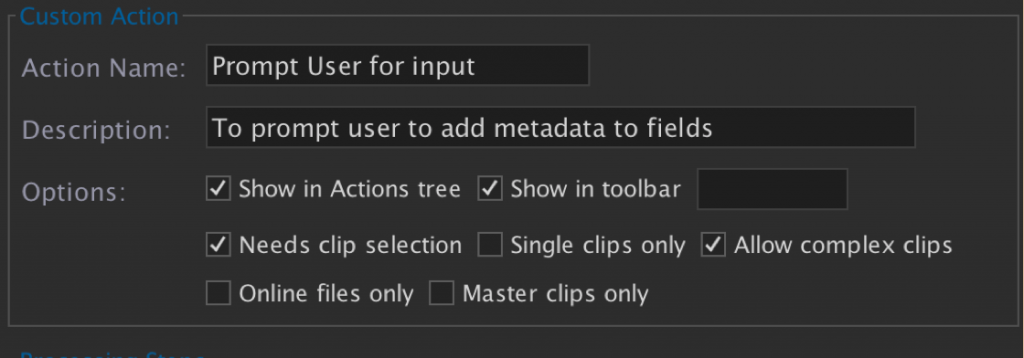
The ‘Allow complex clips’ option enables the action to work on complex MXF clips which are made up of separate files such as RED, Avid formatted files.
There is also an action to show the custom action in the tool bar, the text box to the right allows for a shot custom action name to be displayed.
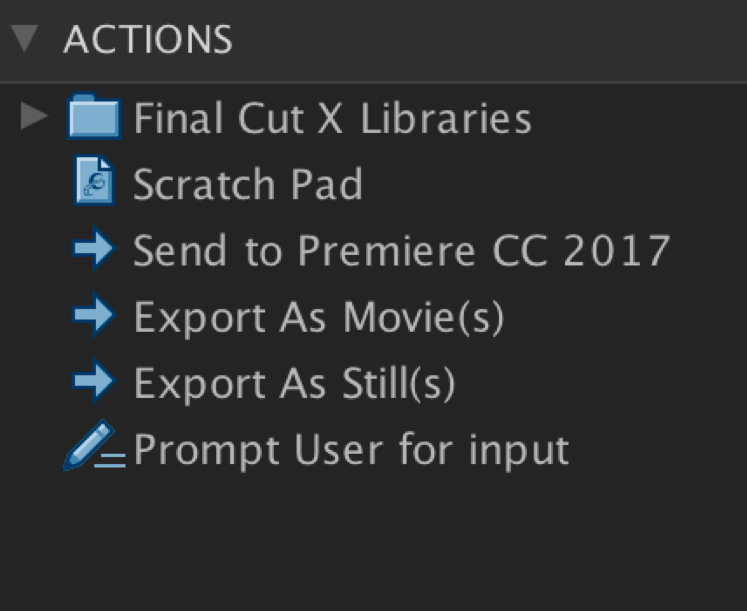
Press OK to save the custom Action which will appear in the left hand view under custom actions.
Custom Action in Operation
In order to activate the custom action, select the clips you want to apply the action to and drag them towards the action and drop them onto it.
The user input box appears requesting user data. Once added press enter and the data is added to the selected fields
Once tested you can add more user input options by duplicating the steps above to daisy chain options. Try also other selecting picklist instead of simple text fields.