Using CatDV
This is a very brief description of the key aspects of getting started with CatDV. For more details please see the full online documentation at https://docs.squarebox.com.
Asset Organization
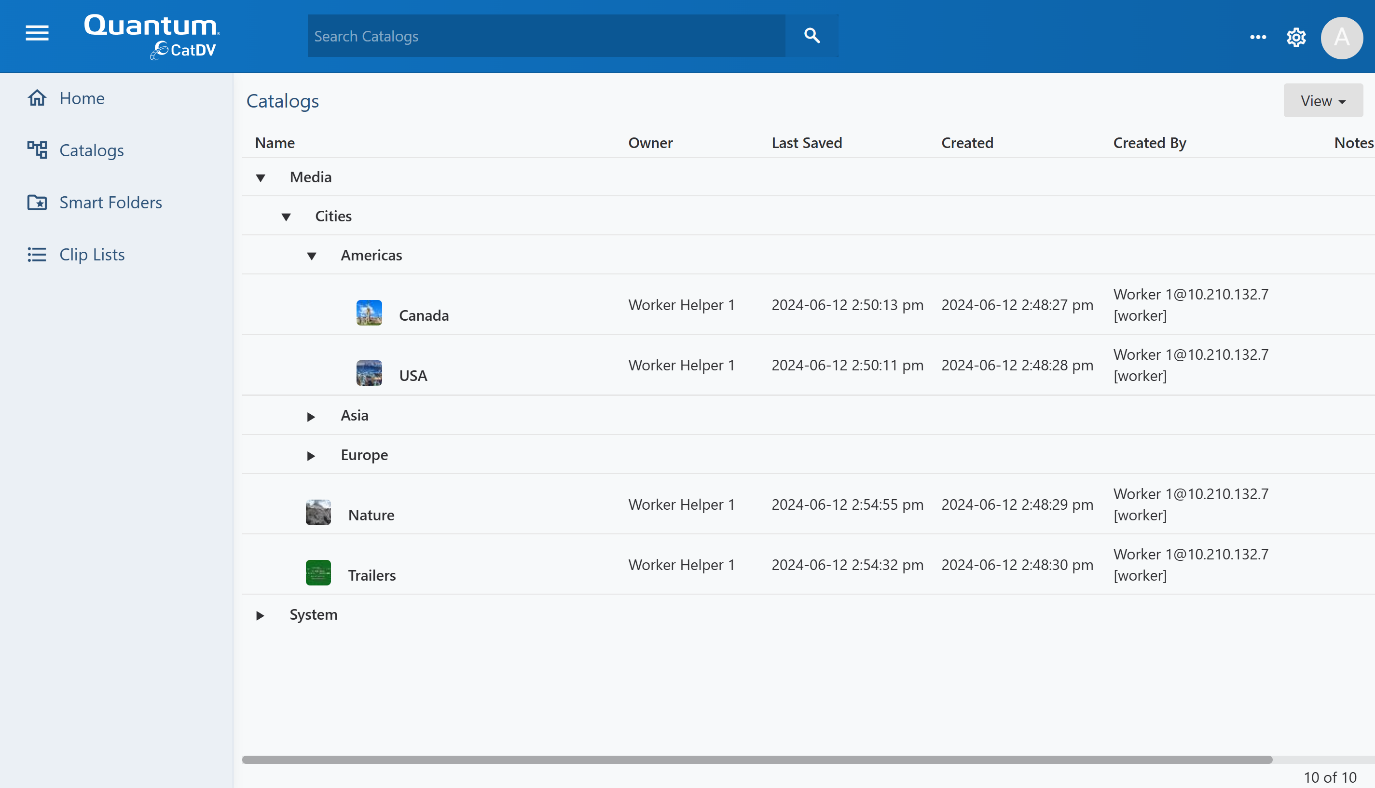
CatDV organizes assets (or clips) into ‘catalogs’ and catalogs into ‘catalog groups’. These groups and catalogs are displayed as a tree structure in the UI.
The indexing workflow built into CatDV Express maps each ‘volume’ (a folder of media assets such as the one you set up during installation) onto a separate ‘catalog group’ and maps each subfolder of the media folder onto a CatDV catalog – as shown below.
Note: when you first log into CatDV it may not yet have indexed any media – so your list might initially be empty. See the “Monitoring Indexing Progress” section below to find out how to see how CatDV is getting on.
Clicking one of the catalogs in the list will open the catalog screen:
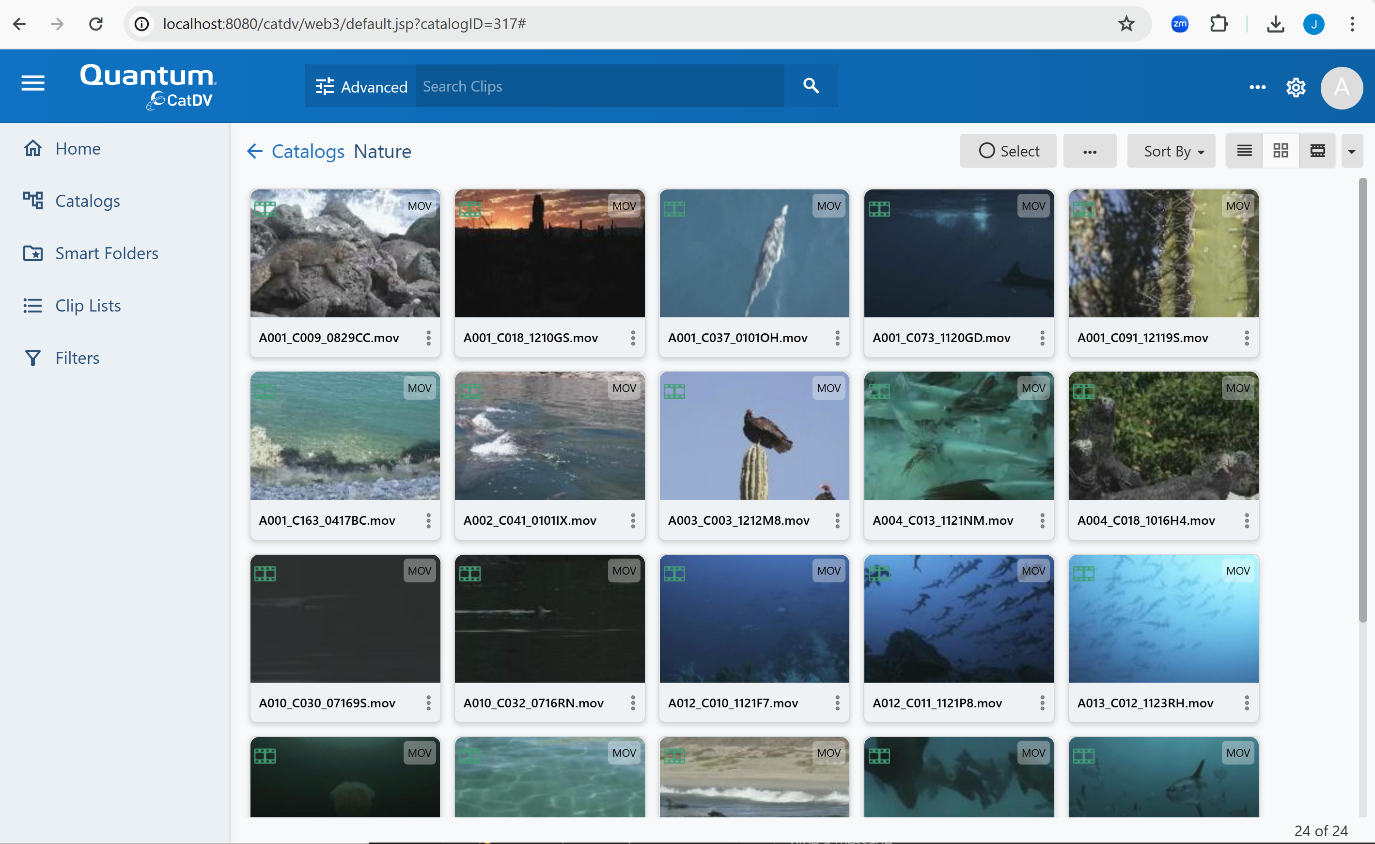
Clicking one of the clips will open the view clip screen:
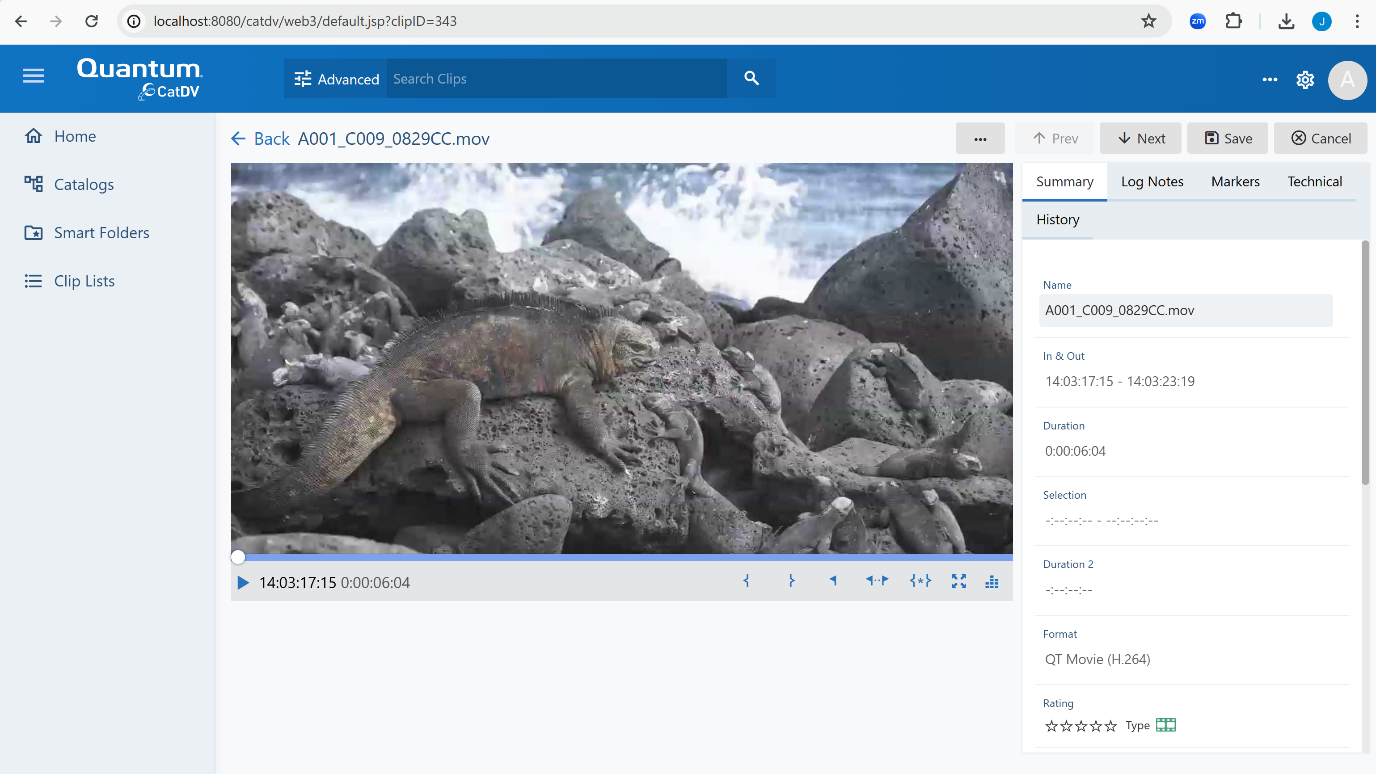
If the proxy for the clip has been generated, you should be able to play the clip using the controls below the player panel.
To the right of the player panel is the details panel, which displays all the information CatDV holds about the clip. It is possible to customize this panel using the ‘Panels’ admin page under the ‘Customization’ section.
Monitoring Index Progress
To check on CatDV’s progress indexing your media you need to go to the administration section by clicking on the small cog icon at the top right of the page. You will then see the Dashboard screen show below, that gives you summary information about the system.
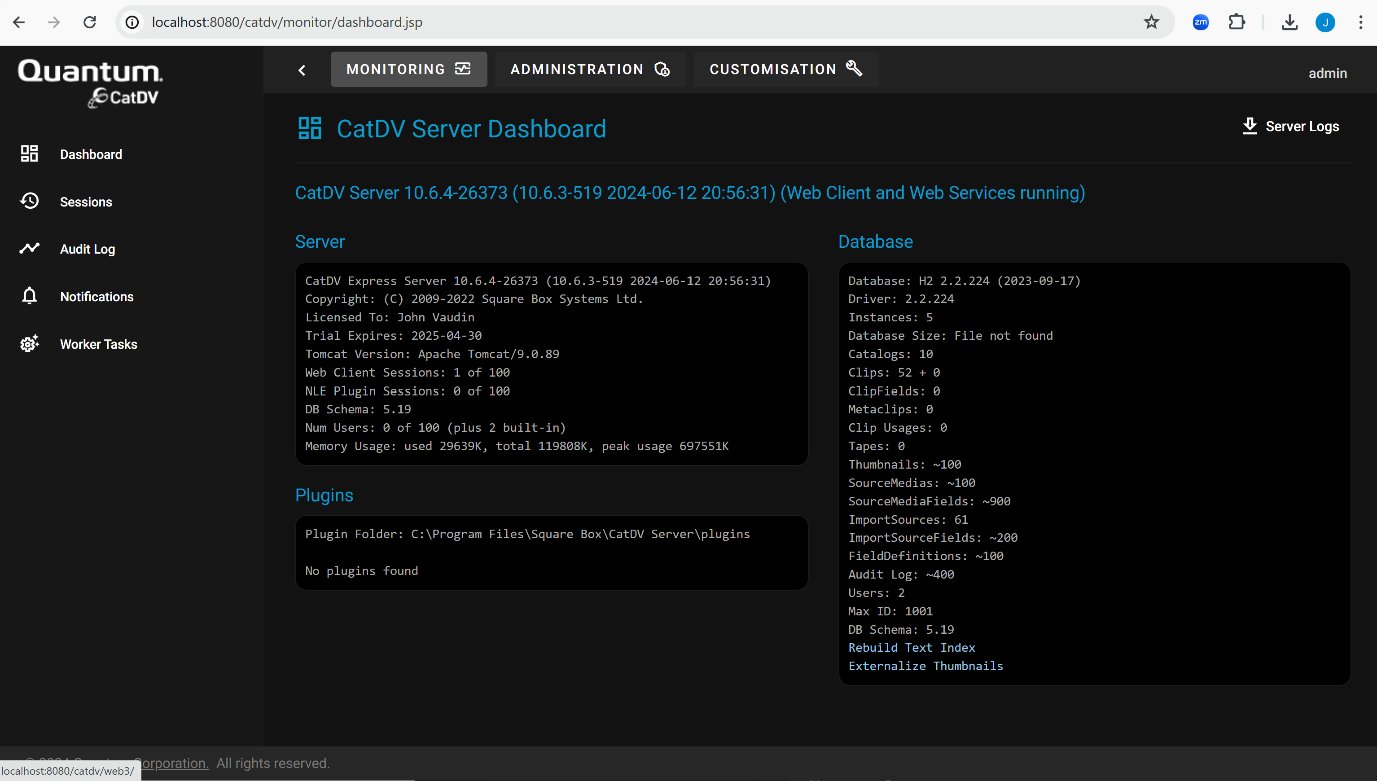
You then need to click on the “Worker Tasks” item in the navigation panel on the left to see CatDV’s current indexing status:
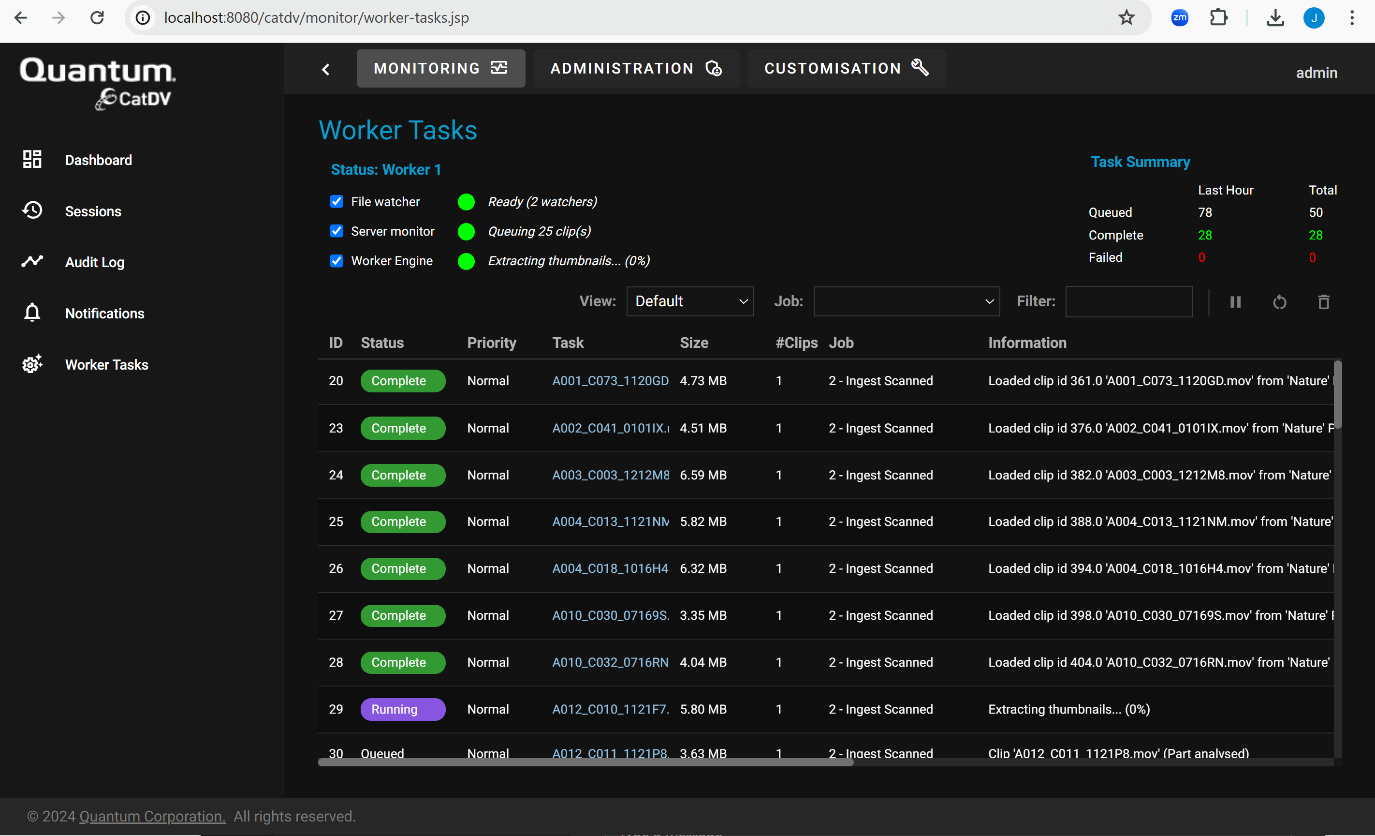
The above page shows the ‘job queue’ for the CatDV Worker, which is the component of CatDV that runs in the background indexing media. The screen shows you the current running ‘jobs’ along with recently completed jobs, and jobs waiting to be executed.
CatDV Express has five different job types that you can monitor:
1. Scan Media – scans the configured media volumes looking for new media files
2. Ingest Scanned – ‘ingests’ the new files, which means it reads the files and extracts information such as media format, embedded metadata (such as time, location etc.) and thumbnail images.
3. Build Proxies – creates web-playable proxy videos for each video asset so they can be played in the web browser. Note that until this phase of processing is complete you won’t be able to play video assets that have been ingested.
4. Extract Metadata – applies the ‘naming rules’ (configured in the ‘Customization’ section) to extract useful information from the file path and name,
5. Scheduled Backup – runs a database backup at 2am every morning. Retains daily, weekly and monthly backups. Backups are a vital part of protecting your data.
During the initial ingest process you will see mostly “Ingest Scanned” jobs running, as CatDV brings the assets into its database. This will be followed by a period where there will be mostly “Build Proxies” jobs running, as it creates the playable proxies. This can take a long time and is very CPU intensive.
Managing Media Volumes
CatDV Express can monitor multiple media volumes. To add additional volumes go to Administration and Volumes.
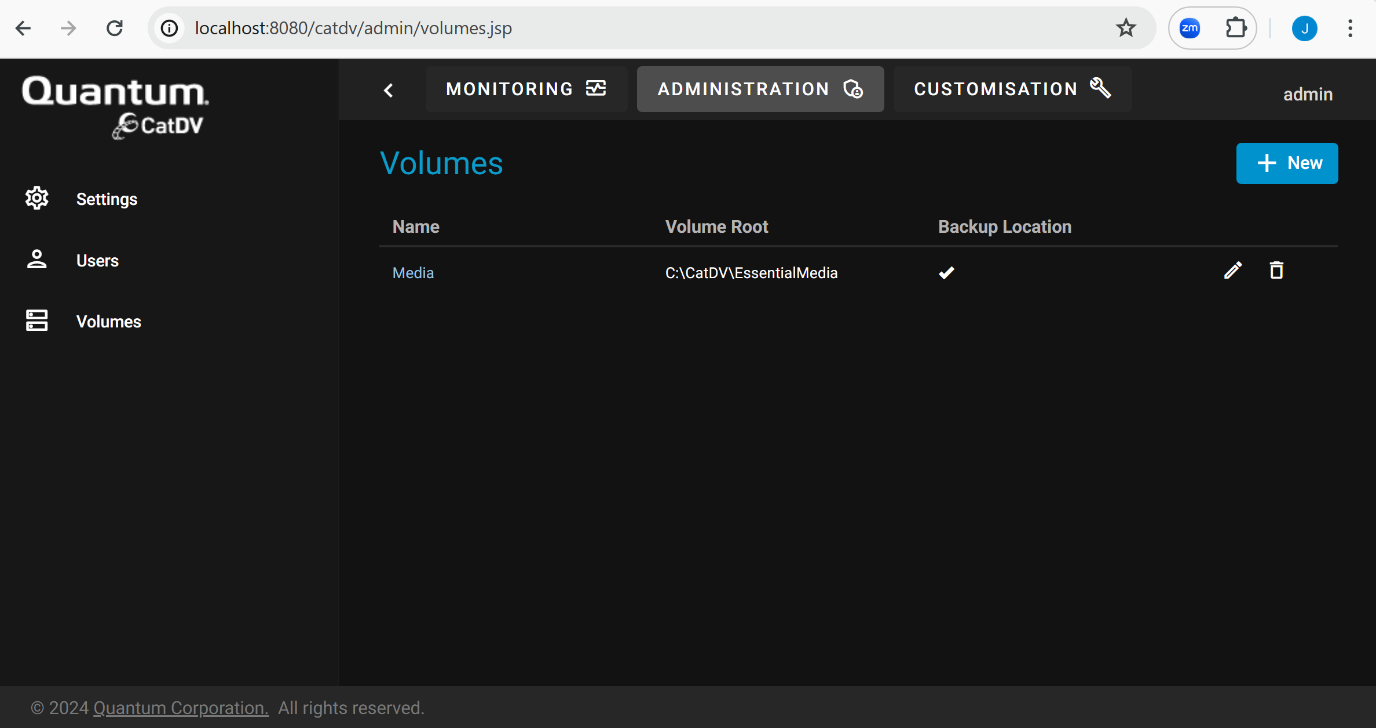
This page displays the currently configured volumes. Initially it will show the volume that was set up during the installation and setup wizard.
You can edit the existing volumes by clicking the pencil icon or remove the volume completely by clicking the trash icon. NOTE: If you delete a volume all the clip records stored in CatDV related to that volume will be deleted (but it will not affect any files stored on disk)
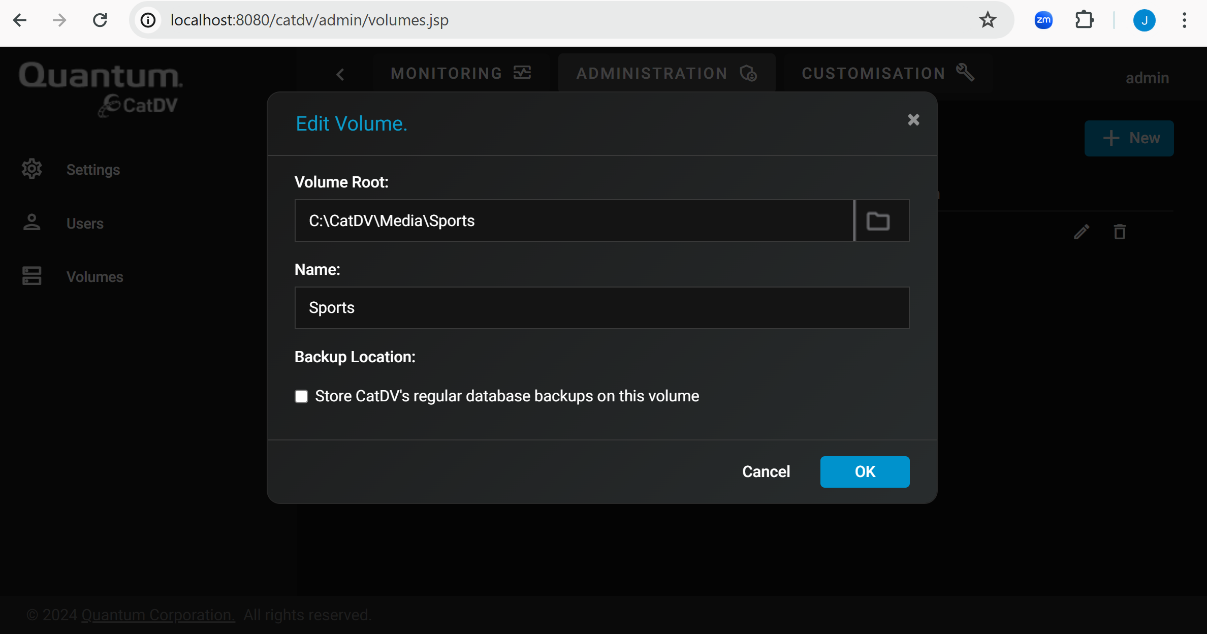
To configure a new volume click the New button:
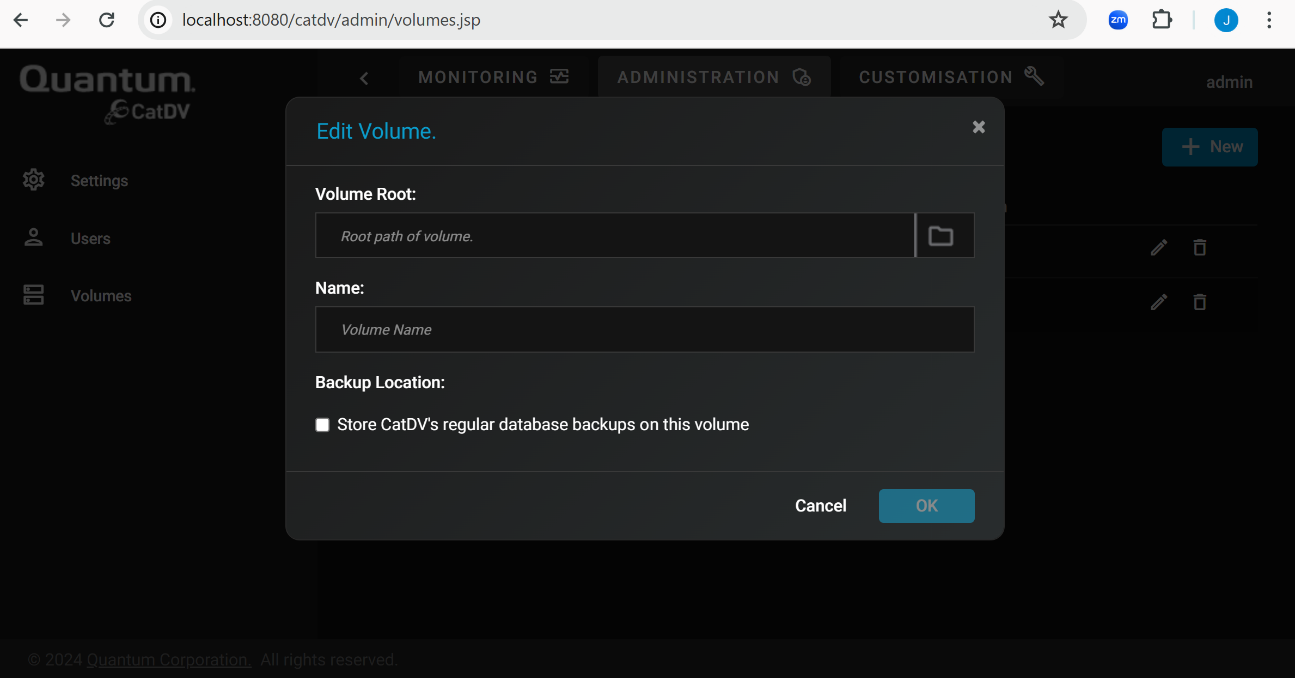
Click the folder icon in the Volume Root field to browse for a folder to index:
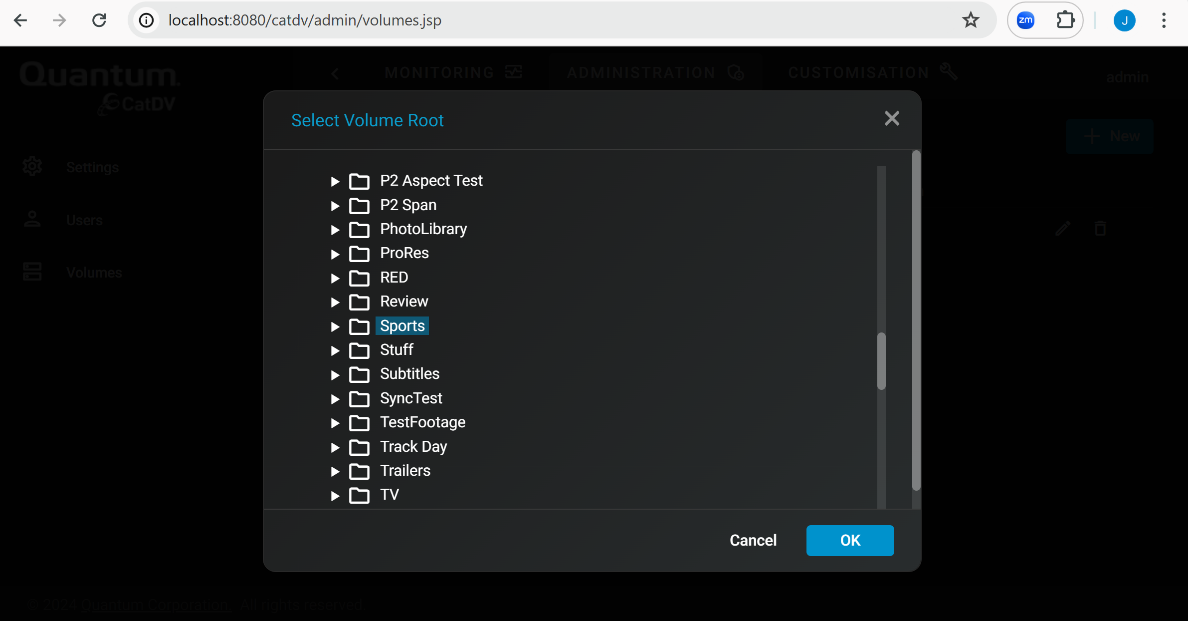
Select a folder and click OK
 :#
:#
By default CatDV will automatically fill in the Name field based on the folder selected, but you can change this if you would like to use a different display name.
Managing Users
Each user of CatDV should have their own login account. You can create and manage login accounts from the Administration / Users page:
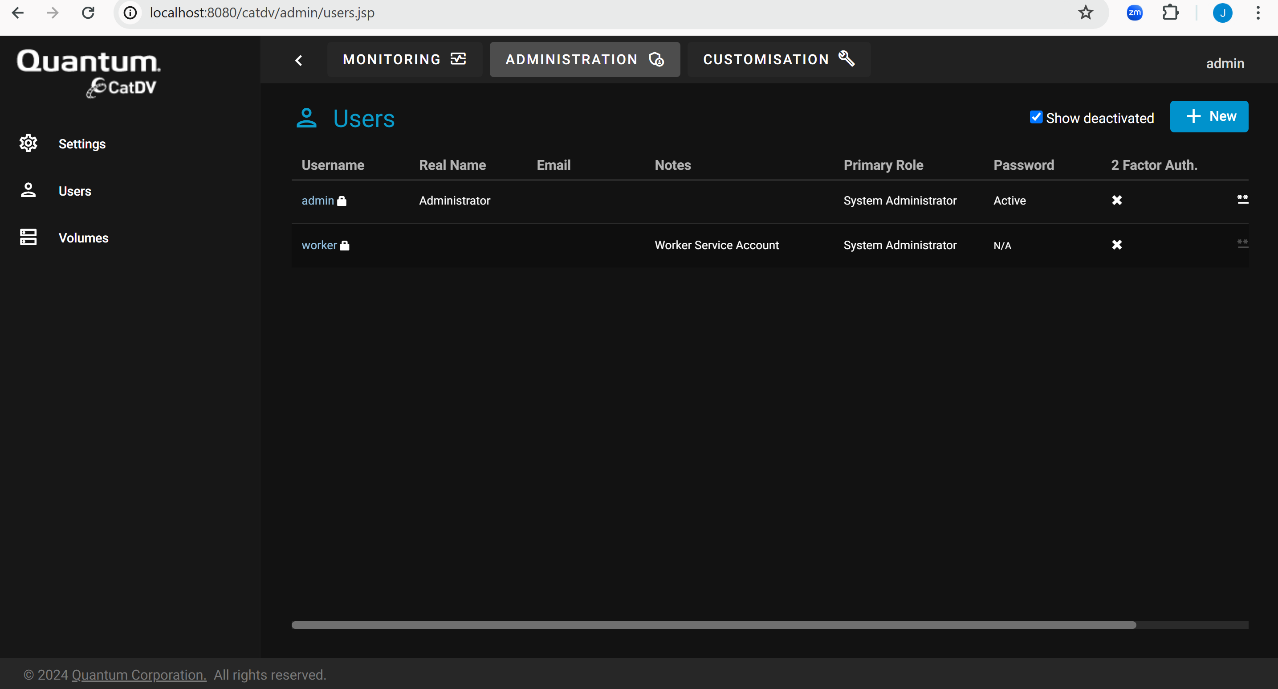
Initially there will be two, fixed users that are created by the installation / setup process. The padlock icon alongside the names of the two built-in users indicates that they cannot be removed.
To create a new user click the New button:
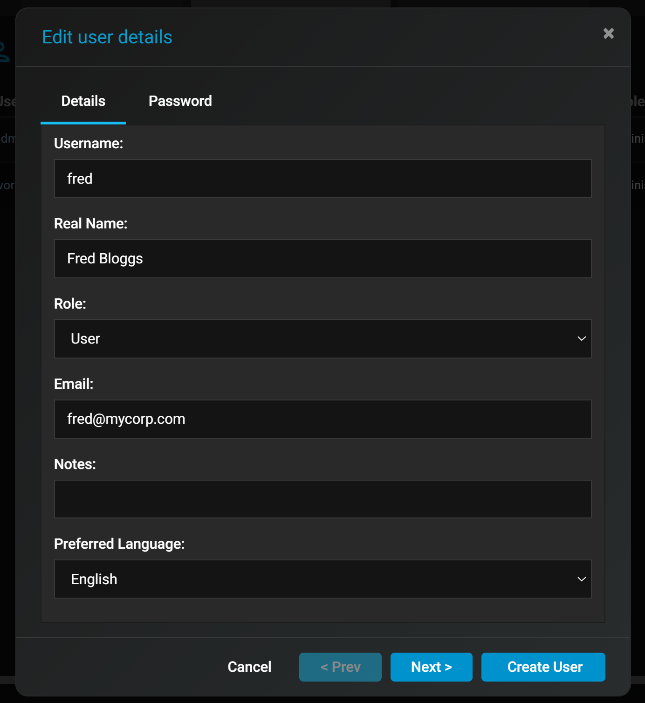
In the form that appears enter the following:
Username: Name the user will enter to login Real Name: The user’s real name Role: Either ‘System Administrator’ or ‘User’. Only users with a role of “System Administator” can access the administration section of the CatDV web interface and manage users, volumes etc. Email: (optional) The user’s email address Preferred Language: Controls the language displayed in the web interface for that user.
Then click Next:
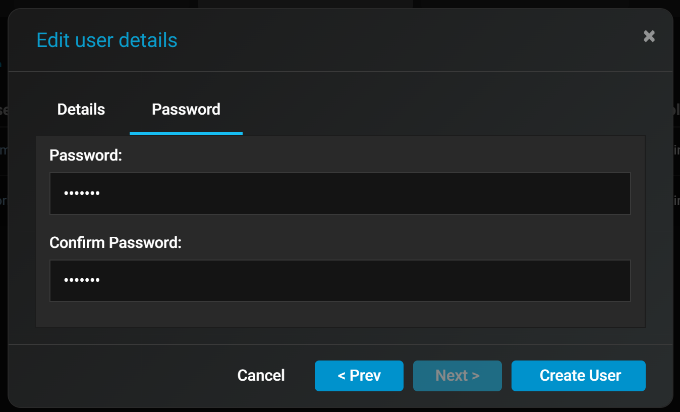
Choose a password for the user – and click Create User. If there are any issues / missing information that prevent the user from being created, this will be displayed at the top of the form.
Further Reading
This document only scratches the surface of what CatDV can do. For more information, please refer to the online documentation at https://docs.squarebox.com. Also please don’t hesitate to contact Quantum’s sales team to discuss what CatDV can achieve for your organisation.
Copyright Quantum Corp. 2024. All rights reserved.